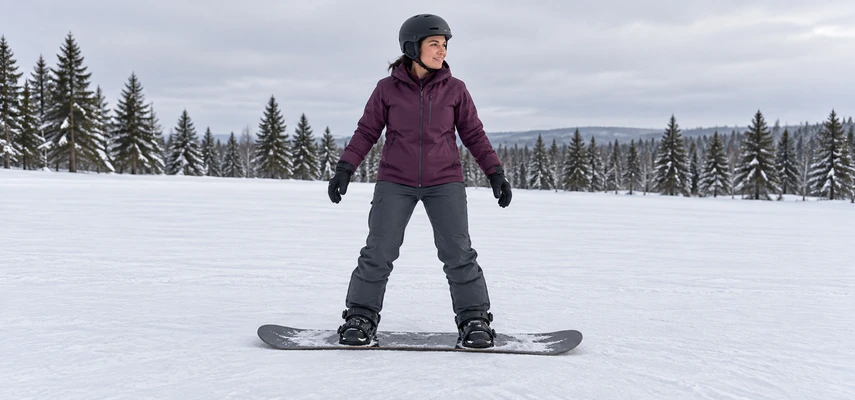

Standing still sounds like the part of snowboarding that shouldn’t require a lesson. Then the board moves a few inches, both feet remain attached to it, and your usual solution—taking a step—has abruptly left the discussion.
The answer isn’t to become rigid. A useful snowboard stance leaves you able to move. Your joints can soften, your body can adjust over the board and your eyes can attend to the space ahead. Balance is less like holding a statue’s pose and more like keeping a conversation going when the other person keeps changing the subject.
Begin on level snow in a designated learning area with an instructor. This article explains the stance and the observations behind early practice; it doesn’t make an unfamiliar slope a suitable place to experiment. First find a manageable setting, then give the movements somewhere sensible to develop.
Get the equipment questions out of your legs’ way
Your boots, bindings and stance setup determine how your movements reach the board. If a boot is loose, your foot can move before the equipment responds. If something creates painful pressure, you may compensate without realizing that you’re doing it. Neither problem is solved by trying to look more athletic.
Ask qualified staff to check fit and setup before practice. Tell them if your knees feel twisted, your heel lifts excessively or movement causes pain. Width and angles can affect comfort, but adjusting them at random makes it harder to identify what’s wrong. Work from an appropriate initial setup and describe the problem specifically.
Regular means left foot leading; goofy means right. The basic balancing task applies to either orientation. Don’t use a difficult first attempt as proof that the lead foot is wrong. New equipment and a slippery surface can feel unfamiliar even when the setup is perfectly reasonable.
For stationary exercises, let the instructor establish a location where the board won’t slide unexpectedly or interfere with traffic. Securing boots and controlling an unattached board are separate skills. You shouldn’t have to learn them while simultaneously drifting toward another lesson group.
Start with joints that can respond
Stand with your feet supported in their bindings and gently flex your ankles and knees. Let the knees move in a comfortable relationship with the toes rather than forcing them inward. Keep the hips in a position that leaves movement available along and across the board.
The important word is gently. You aren’t trying to sit as low as possible. A deep, sustained crouch can exhaust the legs and leave little room to absorb another movement. Straight, locked legs have the opposite problem: they leave little room to soften when the platform changes beneath you.
REI’s introductory stance guidance describes flexed ankles and knees, a calm upper body and a generally aligned relationship between shoulders, hips and board. Use that as a starting point rather than an instruction to freeze. A rider must eventually adapt the stance to the task.
Your arms can rest comfortably rather than reaching dramatically for balance. A small adjustment is ordinary; constant windmilling is useful information that the task may be too difficult or the body position needs attention. Lower the demand before adding more effort.
Understand what centered actually means
In beginner exercises, centered commonly describes a manageable relationship between your body and the board. Along its length, you’re not habitually hanging over the tail or reaching beyond the nose. Across its width, you can influence the heel-side and toe-side contact without throwing your torso away from your feet.
This doesn’t mean equal pressure under both feet at every instant. Riders adjust pressure for different tasks. It also doesn’t mean that a person’s body must remain vertically over the board throughout a moving turn. Speed, terrain and the forces from snow change the relationship.
The AASI technical performance guide separates control of pressure along the board from control across its width. That gives you two different questions to ask: am I crowding one end, and am I losing the relationship to the edge I’m using?
Think of the starting stance as a place from which you can make adjustments. If you move so far backward that bringing your body toward the nose feels impossible, you’ve used up room in one direction. The goal isn’t a perfectly centered photograph; it’s access to the next movement.
Look where the task requires you to look
Beginners often stare at their boots because the equipment is doing something new. Unfortunately, that view supplies little information about the space you’re about to enter. Your instructor can help you establish an appropriate viewing direction for the exercise.
With your body generally sideways to the board, turn your head comfortably toward the intended direction of travel. You don’t need to wrench the whole torso around to face forward. An exaggerated twist can change pressure and alignment while distracting you from what the feet are doing.
Looking ahead doesn’t mean ignoring other slope users or the snow. Scan the area and follow the instructor’s directions about checking uphill before moving. Vision supports decisions; it isn’t a steering mechanism that makes the board turn automatically toward anything you watch.
For a stationary task, pick a clear point at a comfortable distance and notice whether your breathing and shoulders soften. If looking along the board causes discomfort, describe it. It may be a setup or movement question worth addressing before adding a slide.
Learn small movements before adding distance
An instructor may ask you to flex and extend a little while the board remains controlled on level snow. Notice whether the movement comes through the ankles and knees or mostly from folding at the waist. Those can look superficially similar while producing quite different balance.
You may explore gentle pressure changes toward each foot. Keep them small enough that you can return comfortably. This is an awareness exercise, not a contest to see how far you can lean. The useful observation is which movement changes the support you feel.
Another task may introduce a small change across the board’s width. Both boots remain secured while you begin to notice heel-side and toe-side relationships. The instructor should control the environment and explain the intended result; an uncontrolled edge roll isn’t the purpose.
These tasks are deliberately modest. They reduce the number of things demanding attention at once. Once the stance feels more understandable, a short glide in appropriate terrain can reveal how the same relationships change when the platform moves.
Why leaning away can make things harder
When a slope feels intimidating, moving the body uphill or toward the tail may seem reassuring. That response is understandable. But moving away from the task can make it harder to manage pressure and guide the board, particularly if the rear leg becomes a brace rather than a responsive part of the stance.
The answer isn’t to lunge downhill. It’s to reduce the task and restore a workable relationship between body and board. An instructor may choose flatter terrain, a shorter glide or another exercise that lets you experience support without feeling hurried.
Similarly, bending at the waist can lower the head without providing useful flexibility through the legs. You may feel crouched while the lower body remains stiff. Ask the instructor to show the difference and give one clear cue for the next attempt.
If you find yourself holding your breath or gripping every muscle, pause. A smaller task, a brief rest or equipment help may be more useful than repeating the same tense attempt. Balance develops through information and adjustment, not through maximum muscular disagreement with the slope.
Notice what changes when snow starts moving beneath you
A stationary stance is preparation, not the whole skill. During a glide, slight changes in the snow surface can shift pressure. You need enough movement available to respond without treating every bump as an emergency.
Start only where an instructor has selected suitable terrain and a clear stopping arrangement. A level-ground success doesn’t establish readiness for a chairlift or a long beginner trail. Trail ratings are relative, and conditions can make familiar terrain more demanding.
The NSAA Responsibility Code requires staying in control and avoiding people ahead. That remains true during practice. Choose a space with guidance, check before moving and don’t stop where others can’t see you from above.
One useful observation after a glide is whether you could still make a small adjustment. If you felt trapped in a rigid position, ask which part of the task to simplify. If one foot consistently felt overloaded, describe the sensation rather than guessing at a large correction.
Leave room for the next skill
Ask your instructor to identify a stance cue you can recognize for yourself. Perhaps your legs remain mobile, your shoulders feel calmer or you can look along the intended route without twisting awkwardly. One observable cue is more useful than trying to remember a complete body checklist while sliding.
Stop practice when fatigue, pain or confusion makes control unreliable. If something hurts, get appropriate help instead of assuming discomfort proves that the stance is working. Good preparation should make the next task more accessible.
The aim is to stand in a way that allows riding to happen. You’ll adjust that starting relationship as you learn to skate, slide, stop and turn. For now, a board beneath two feet, a manageable setting and a body with room to respond are plenty to work on.