
The most reassuring moment in an early ski lesson isn’t necessarily the first glide. It’s the first time the glide ends because you intended it to.
Stopping turns motion from something that happens to you into something you can manage. It also creates the room to learn everything that follows. Without a reliable way to slow and stop on the terrain you’re using, a longer run simply gives uncertainty more distance to develop.
Begin with an instructor in a designated learning area. A short gentle slope, clear practice space, and an appropriate runout matter as much as the movement. The explanations here support that instruction; they aren’t an emergency plan for trying unfamiliar techniques after speed has already become a problem.
Understand what the skis must do
To slow down, the interaction between the skis and snow must oppose enough of your motion to reduce speed. A skier can also change direction so that gravity contributes less acceleration, or eventually opposes the chosen path.
This is why stopping isn’t just a matter of making the skis look a particular way. Their orientation, edge engagement, support, and the snow surface all affect the result. A wedge drawn perfectly on paper has no braking power until it meets the snow appropriately.
Speed matters too. More speed generally means more distance and demand to bring the motion under control. There isn’t a universal stopping distance you can rely on across surfaces, gradients, equipment, and skill levels.
Choose space and speed that allow a comfortable margin. If your plan requires the shortest possible stop to avoid someone, the problem began before the final braking movement.
The wedge gives beginners a manageable starting tool
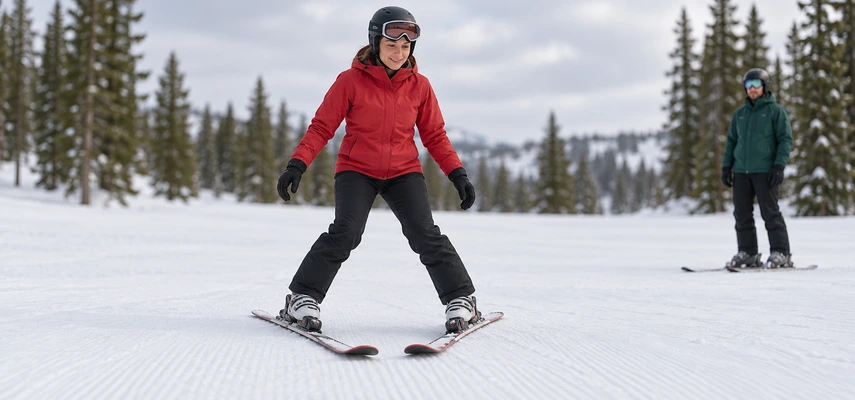
The snowplow, also spelled snowplough, is commonly called a wedge. The ski tips are closer together than the tails, with a gap so the tips don’t touch or cross.
On suitable gentle terrain, that arrangement lets the skis brush against the snow and create resistance. Modest engagement of the inside edges contributes to controlling the slide. The instructor helps you find the combination that works without an exaggerated stance.
The wedge can provide a useful platform while you become familiar with moving skis. It isn’t an admission that parallel skiing is beyond you, nor a shape you must use unchanged forever.
REI’s beginner instruction introduces wedge practice in a short, gentle setting. The important boundary is the setting: a method that works during early learning isn’t a reason to test it on a steeper unfamiliar route.
Build the shape before asking it to stop a glide
Start on level snow selected by the instructor. Explore guiding the tails apart while keeping the tips separated and your body supported over the feet. Keep the movement comfortable rather than forcing the legs into the widest possible triangle.
Soften the ankles, knees, and hips enough to remain mobile. Avoid collapsing the knees inward or sitting backward. The task is to organize the skis against the snow, not to create a dramatic lower-body pose.
An instructor may use different cues depending on what you need. Pushing the heels outward can help one learner understand the shape, while another needs a demonstration of the feet and legs. No single phrase works identically for everyone.
If the movement hurts or the skis won’t behave as expected, stop and ask. A fitting issue, unfamiliar boot support, or an overly large movement may need attention before adding a slope.
Add a very short, supervised glide
Use the terrain and starting point the instructor selects. Look uphill, wait for clear space, and make a short glide while exploring the wedge’s effect. The practice area should allow the instructor to manage the task without relying on your first attempt being successful.
Notice the difference between merely holding the shape and changing the amount of resistance. Small coordinated adjustments can be more useful than suddenly forcing the tails far apart. Keep the upper body quiet enough to stay supported.
Don’t lean backward in an attempt to resist the slide. That can make it harder to guide the skis. Ask the instructor to observe where your body and feet are in relation to each other.
SkierLab’s braking-plow progression stresses gentle terrain and a suitable runout, explicitly recognizing that a learner may not yet be able to stop. That is a reason for careful teaching design, not a reason to start higher and hope.
Look for a repeatable result
A successful stop should be intentional enough to repeat in the selected setting. One attempt may end because the terrain flattened, a ski caught, or the snow happened to resist more strongly. The instructor can help identify what actually produced the result.
Practice short starts and stops as directed, leaving appropriate space between learners. Notice whether you can remain balanced, keep the tips separated, and come to rest without a sudden collapse or uncontrolled direction change.
You don’t need to increase distance every time an attempt works. Repeating a manageable task gives you information about consistency. A small dependable skill is more useful than a larger task that succeeds only occasionally.
When the instructor changes the setting, expect to reassess. Different snow or gradient can change the effect. Treat stopping ability as something demonstrated on the terrain at hand, not a certificate earned once for the rest of the mountain.
When the wedge isn’t working, reduce the problem
If the skis keep running, the answer isn’t automatically a bigger wedge. Too much stiffness, backward support, insufficient useful edge engagement, or terrain that is too demanding may be contributing.
If the tips cross or catch, don’t continue forcing the same movement at greater speed. Return to a simpler task and have the instructor check the ski relationship and balance. Small differences between the legs can produce noticeable differences at the tips.
If one side feels much harder, describe it specifically. Is one ski turning more, one boot uncomfortable, or one leg bracing? Useful observations let the instructor choose a correction rather than repeating a general instruction to try harder.
Never make steeper terrain the troubleshooting tool. A slope adds speed and consequence before it adds understanding. Go back to the manageable environment where the movement can be examined calmly.
Turning helps stopping become part of a route
As you learn to change direction, the shape of a turn becomes another way to manage motion. A turn that develops across the slope can reduce the downhill component of your travel; an appropriate uphill finish can help bring you to rest.
That doesn’t mean making a sudden sweep across traffic whenever you want to stop. Route choice must account for other users and available space. Look, plan, and practice in the setting your instructor chooses.
The PSIA-AASI Eastern task descriptions connect early turns to steering, support, and edge release. Stopping and turning develop together, rather than remaining entirely separate buttons.
Detailed turning practice is its own lesson. For now, understand the purpose: speed is easier to manage when the whole path helps, rather than when every descent ends with one increasingly strenuous braking effort.
Beyond the wedge: parallel stopping is a learned coordination
With appropriate instruction, skiers develop ways to turn parallel skis across the direction of travel, control a sideways skid, and come to rest. The familiar hockey stop combines leg rotation, balance, and edge control.
It can look abrupt when performed well. That appearance hides the preparation and coordination. Throwing the shoulders sideways or jamming the edges in suddenly isn’t the same skill and can produce a fall or an unpredictable path.
PSIA-AASI Central’s hockey-stop description identifies parallel ski rotation, controlled sideslip, and a complete stop as parts of the task. Learn it on suitable terrain with professional feedback, including practice in both directions as appropriate.
Don’t appoint it as your emergency technique before you’ve learned it. The useful progression moves from reliable existing control toward new coordination, not from unfamiliar speed toward a last-second invention.
Avoid improvised brakes
Dragging poles, trying to grab another person, aiming at a snowbank, or deliberately falling are not dependable routine stopping methods. They can create additional hazards and leave you without control of your direction or equipment.
Likewise, don’t depend on a friend waiting below to catch you. A learning arrangement should not put another person in the path of a skier who cannot stop reliably.
If you become stuck or unable to manage the terrain, stop in a suitable visible place when you can and ask staff or patrol for assistance. Don’t continue into a harder section because the group is waiting.
The NSAA responsibility code requires being able to stop or avoid people and objects. That responsibility supports conservative terrain choices and asking for help before the situation exceeds your skills.
Let control decide the next step
Before moving to a longer or busier route, ask the instructor whether your stopping and turning are reliable enough for that setting. Consider the current snow, visibility, traffic, and fatigue as well as the trail label.
Keep the final stopping place visible and clear of traffic. Look uphill before starting again. A complete stop isn’t the end of shared-space awareness; it changes what you need to check next.
The satisfying milestone is modest but powerful: you begin a short glide, manage it, and finish where you intended. That control gives the next lesson somewhere solid to start—even when the ground remains delightfully slippery.