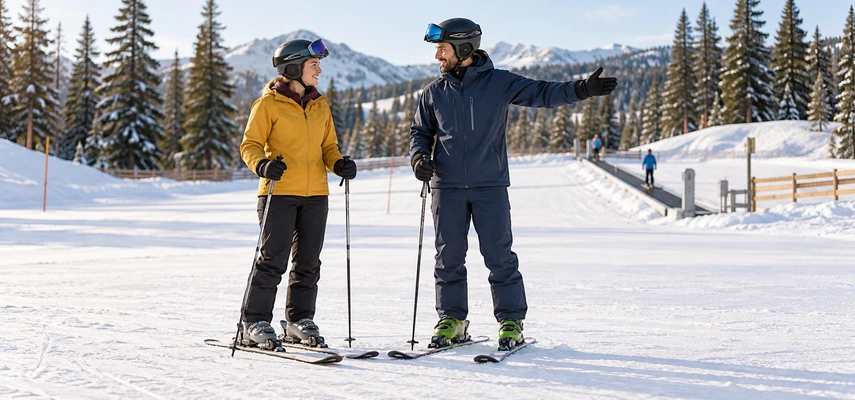

Your first ski trip doesn’t need a famous mountain. It needs a place to learn, equipment that fits, enough time to use both, and a plan that doesn’t assume you already know how any of this works.
That sounds obvious until you discover that the lesson, rental counter, parking lot, and beginner lift can be four separate logistical questions. The actual skiing may be the most straightforward part of the booking process.
The useful approach is to build the day around learning rather than around maximum mountain access. Start with a manageable destination and professional instruction, then fit the rentals, clothing, travel, and budget around that choice. You can leave the quest for the perfect ski collection until you know whether you enjoy wearing the boots.
Choose the learning experience before the mountain
Look for a ski area with an established first-time program, suitable learning terrain, and rental equipment. A smaller nearby area can provide an excellent introduction; acreage and famous terrain aren’t measures of how well your first lesson will work.
Ask where beginners actually learn. A designated teaching area with a gentle slope and appropriate uphill transport is different from being directed toward a long green run. The green category is relative to each resort, and a first-timer needs more specific information.
Check whether the program teaches alpine skiing, the conventional lift-served downhill activity, or another discipline. A Nordic center offers a different experience, with different equipment and lesson content. Neither is a wrong beginning, but they shouldn’t be accidental substitutes.
If you need adaptive equipment or specialist support, contact the program before booking. Explain your needs and ask what instruction, access, and rentals are available. Advance planning gives staff a chance to match the experience appropriately.
Book a first-time lesson honestly
Tell the school you’ve never skied, or describe any previous experience accurately. Someone who slid around once years ago may still belong in a first-time setting. An honest starting point is useful information, not an admission of sporting inadequacy.
An instructor can choose terrain, observe movement, and provide feedback while the task is still manageable. A confident friend may know how to ski without knowing how to teach it, recognize a fitting problem, or select an appropriate first progression.
Group lessons can offer shared learning and a social setting. Private lessons provide more individual attention and flexibility, usually at a higher price. The best choice depends on your needs, comfort, budget, and what the school actually offers.
Vail’s first-timer information illustrates how resorts separate lesson products and package options. Treat any named program as an example, not a universal model. Confirm current details directly with the area you choose.
Find out what the price includes
A ski day can involve separate charges for instruction, equipment rental, and access to lifts or learning terrain. Some first-time packages combine these; others require additional purchases. A lesson confirmation isn’t proof that everything else is covered.
Ask which access product you need for your lesson. A beginner-area ticket may be sufficient for the intended session, while a full-mountain product could provide access you won’t use. Only the resort can confirm the appropriate current option.
Also check whether a helmet is included, whether goggles are available, how long the rentals last, and when equipment must be returned. Clothing is often a separate responsibility. Ask about cancellation, weather disruption, and late-arrival policies before committing money.
Budget for transport, parking where applicable, food, and any accommodation. Compare the complete learning day rather than the most attractive single advertised price. The cheapest headline can become less impressive after the missing pieces join it.
Rent a suitable setup rather than assembling one by guesswork
Renting is a practical first step because staff can select and fit compatible equipment for the intended activity. Borrowed skis and old boots may look convenient while concealing sizing, compatibility, condition, or adjustment problems.
Give the technician accurate information about your experience and the details they request. The Canadian Ski Council’s rental guidance emphasizes honesty about the skier. Those answers help the technician prepare an appropriate setup; they’re not questions to answer aspirationally.
Have the shop handle binding adjustment and testing. Don’t copy another person’s release settings or assume equipment is ready because the boot clicks in. Bindings cannot prevent every injury, and their safety function depends on more than visual appearance.
Allow time to discuss boot fit. Describe pressure points, numbness, excessive movement, or difficulty finding a comfortable stance. Don’t simply accept pain as proof that ski boots are supposed to be serious objects. Ask the staff to assess the problem before heading to the lesson.
Dress for a changing combination of activity and waiting
You may be moving actively during practice, then standing for an explanation or sitting on a lift. Clothing needs to handle both effort and exposure, which is why adjustable layers are more useful than one enormous warm item.
Use a suitable base layer, an insulating middle layer as conditions require, and an outer layer that helps block wind and moisture. Bring gloves or mittens, appropriate socks, and eye protection. Check the mountain forecast rather than dressing for the temperature outside your front door.
A properly fitted snow-sport helmet belongs in the plan, but it doesn’t eliminate the risk of concussion or other serious injury. Make sure helmet and goggles work together comfortably, and ask staff for fitting help.
Don’t start by buying every premium accessory. Identify what you own, what you can appropriately borrow, and what you need for the forecast conditions. Clothing should help you concentrate on learning, rather than make the day a test of tolerating wet hands or an awkward fit.
Give the arrival a realistic amount of time
Confirm the precise meeting place, check-in time, rental location, and travel between them. At a large resort, “near the base” can conceal a surprisingly energetic walk in ski boots.
Ask the school how early a first-time renter should arrive. Leave room for paperwork, fitting, collecting access products, parking or shuttle transfers, and finding the lesson. The lesson start time is usually when you need to be ready, not when you should begin looking for the rental shop.
Plan winter travel using current road and weather information. Check parking reservations, transport options, and any vehicle requirements along your route. If conditions exceed your driving experience, use an appropriate alternative or change the plan.
Save booking details and contact information where you can retrieve them easily. A phone is helpful, but don’t make one unreliable signal or a flat battery the sole location of every useful detail.
Set a first-day goal that makes sense
An excellent first goal is learning to move and stop with control on appropriate beginner terrain. The aim isn’t to reach a summit, finish a particular number of runs, or keep pace with friends who have skied for years.
Early learning may include handling equipment, balancing on sliding skis, moving short distances, and making simple direction changes. The exact progression should fit the learner and setting. Different people need different amounts of time.
Don’t use a promotional promise or another person’s experience as your personal deadline. Progress should be based on what you can reliably do, not how many hours have passed or what you hoped to post afterward.
Ask the instructor what to practice after the lesson and where to do it. Also ask what would indicate readiness for the next step. A clear, limited practice task is much more useful than being released with a vague instruction to get confident.
Learn the shared-space rules before the slope gets busy
The NSAA responsibility code gives the basic duties for sharing resort terrain. Stay in control, avoid people ahead or downhill, look uphill before starting or entering a trail, and stop where you’re visible without obstructing others.
Obey closures and signs, prevent runaway equipment, and ask for help before using an unfamiliar lift. Do not use lifts or terrain while impaired. These responsibilities begin on the first day, not after the skier graduates to more impressive equipment.
Stay on open terrain appropriate to your ability. Backcountry and resort-accessed unmanaged terrain involve additional hazards and preparation; a beginner lesson doesn’t qualify you for them. A visible track beyond a boundary is information about where someone went, not permission or a safety assessment.
Know how to contact ski patrol or a staff member. If something goes wrong, ask for assistance rather than trying to solve an unfamiliar mountain problem alone. Staff are a resource worth locating before you need them.
Plan for breaks and an easy finish
Leave time to eat, drink, warm up, and address equipment discomfort. If fatigue begins to interfere with controlled movement, choose an easier task or stop. Finishing while you can still make deliberate decisions is more useful than squeezing out one deteriorating run.
Agree on a meeting place if you’re visiting with experienced friends. They can enjoy their skiing without becoming responsible for towing you through terrain beyond your skills. A shared lunch works better than a shared commitment to an unsuitable descent.
Keep the end of the day uncomplicated: return rentals on time, record the instructor’s useful feedback, and note what you’d change next time. Those small practical details make a second visit easier to arrange.
The first trip is an introduction, not a final verdict on your potential. Give it suitable terrain, sound instruction, and enough breathing room to learn. Once you discover the pleasure of a turn you intended to make, the next planning question tends to arrive on its own: when can you come back?