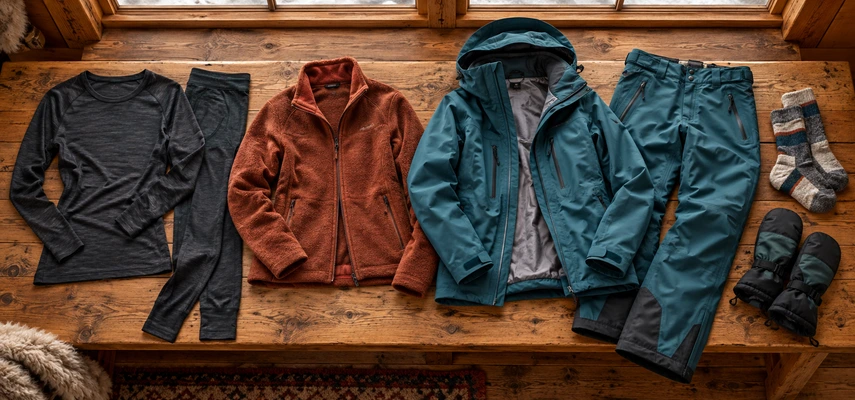

A ski day asks your clothes to solve two opposite problems. While you’re practicing, your body produces heat and moisture. A few minutes later, you may be sitting on a lift with the wind doing its best to remove both your warmth and your enthusiasm.
The answer isn’t simply more clothing. It’s a system you can adjust: something next to the skin to manage moisture, insulation to slow heat loss, and an outer layer to limit wind and wet snow. The details depend on the forecast, your activity, and how warm you tend to run.
Start with the job each garment must do. That makes it easier to use suitable items you already own, identify the pieces worth borrowing or buying, and avoid turning a first ski outing into an expensive costume exercise.
Think about heat, moisture, and wind together
Insulation helps retain the heat your body produces. Moisture can undermine comfort, especially when effort stops and damp clothing remains next to you. Wind increases exposure, while snow can enter cuffs, collars, or an unsuitable outer layer.
A good outfit deals with those problems as a connected system. Adding a very warm jacket over damp cotton doesn’t automatically solve the moisture problem. Wearing a technical base layer under a shell doesn’t create enough insulation for every cold lift ride either.
The three-layer framework separates those jobs without requiring exactly three garments in every situation. An insulated jacket combines functions, and mild conditions may call for less insulation than a cold, windy day.
Salomon’s skiing clothing guide explains the same functional approach. Use the framework to make choices, then adapt it to the actual conditions rather than treating a diagram as a mandatory uniform.
Begin with a comfortable base layer
A base layer sits next to your skin. Choose a comfortable wool or synthetic garment intended to handle moisture and dry reasonably efficiently. It should fit beneath the rest of the outfit without bunching or restricting movement.
Merino wool and synthetic fabrics both have useful applications. Differences in feel, drying behavior, durability, and cost can matter more to you than an argument about one universally superior fiber. Try the garment on and consider the complete outfit.
Cotton T-shirts, cotton long underwear, and jeans are poor defaults for a snowy activity where clothes may become wet and remain damp. The issue isn’t that cotton is morally opposed to winter. It’s that persistent moisture can make the rest of the day uncomfortable and harder to manage.
Avoid assuming the thickest base layer is always best. A garment that makes you overheat during easy activity may create dampness you later regret. Base-layer weight should work with your insulation and the forecast, not compete with them.
Use the middle layer for adjustable insulation
A fleece, wool layer, or suitable insulated jacket can provide warmth between the base and shell. The useful feature is that you can change the amount of insulation without replacing the entire outfit.
Fleece can be straightforward to ventilate and layer. Down and synthetic insulated garments offer different combinations of warmth, bulk, moisture behavior, and care needs. For resort skiing, choose something that fits comfortably under the outer layer and suits the expected exposure.
Don’t compress everything into a jacket too tight to move in. You should be able to bend, reach, and adopt a comfortable skiing stance without the clothing dragging you into a different position.
A beginner may spend more time standing than an experienced skier making continuous runs. Conversely, learning unfamiliar movements can feel surprisingly energetic. Adjustable insulation gives you a response to both situations instead of forcing you to guess perfectly at breakfast.
Let the outer layer handle the weather
Your jacket and snow pants need to resist the wind and moisture you’re likely to encounter. A shell provides protection with little insulation of its own; an insulated garment includes warmth within the outer piece.
Neither approach wins every day. A shell offers flexibility when paired with different middle layers. An insulated jacket can be convenient for someone who wants fewer separate pieces and expects cold lift-served conditions.
Check practical details: room for layers, comfortable movement, useful cuffs, a secure closure, and vents you can operate with gloves. A hood should work with the rest of your setup without interfering with helmet fit or vision.
Great Divide’s first-time clothing advice stresses protection from snow and wind rather than fashion. Snow pants or bibs are especially useful because learners may spend time kneeling, sitting, or getting up from the snow. Ordinary jeans offer little help with that assignment.
Dress the lower half as deliberately as the upper
Suitable base-layer bottoms and protective snow pants are a simple starting point. Bibs provide additional coverage around the waist, while conventional pants may be easier for some people to manage. Fit and convenience matter alongside warmth.
Check the waist and jacket overlap while bending, not only while standing still in a shop. Snow finds gaps with an efficiency few designers of household storage could rival.
Keep bulky seams and folded fabric away from pressure-sensitive areas inside ski boots. Many skiers use base-layer bottoms that end above the boot, or arrange the fabric so it doesn’t bunch beneath the cuff. Ask a fitter about persistent pressure rather than layering around it blindly.
The pant’s outer cuff generally goes over the boot, with its gaiter arranged as the garment is designed. Don’t trap unnecessary layers inside a tightly fitted boot in the hope of improving warmth. Clothing and boot fit need to cooperate.
One suitable pair of socks usually beats a stack
Use ski-appropriate socks made from wool or synthetic materials, with a height that avoids a rubbing edge inside the boot cuff. A smooth fit without wrinkles is more useful than simply adding thickness.
Two thick pairs can make an already snug boot tighter and change the fit in unhelpful ways. More fabric doesn’t guarantee warmer feet. If the boot feels excessively tight, the answer is an assessment, not a determination to tolerate it until lunch.
Put on dry socks for skiing and avoid cramming trousers or loose fabric into the boot. Bring a spare pair if convenient, particularly when travel or wet conditions could leave the first pair damp.
If your feet become numb, painful, or persistently cold, stop and address the problem with staff. Don’t diagnose it from sock thickness alone. Fit, moisture, conditions, and other factors may need attention.
Protect hands without sacrificing basic function
Choose insulated gloves or mittens with weather protection suitable for the conditions. Mittens often help retain warmth by keeping fingers together; gloves can make handling equipment easier. Fit and actual construction matter more than the label alone.
Try operating jacket closures and holding a pole grip before the trip. A glove that makes every adjustment a wrestling match can become frustrating quickly. Thin liners may help with brief tasks, but aren’t a substitute for adequate protection in cold conditions.
Keep gloves dry where possible and secure them when removing them. A spare pair can rescue a day if the first becomes wet. Never attach loose items in ways that could catch in lift machinery.
Warm hands also depend on the rest of the outfit and your exposure. If you’re getting cold overall, buying a more dramatic-looking glove isn’t the only question to consider. Take a warm-up break and reassess the system.
Helmet, goggles, and face coverage must work together
Choose a properly fitted helmet designed for snow sports. Have knowledgeable staff assess the fit, and follow the manufacturer’s instructions about compatible liners and accessories. A bulky hat jammed under a helmet can alter how it sits.
Goggles should fit comfortably with the helmet and provide suitable visibility. Different lenses suit different light conditions, so ask for advice rather than assuming the darkest lens is always the best winter choice.
A neck gaiter or suitable face covering can help close exposed gaps without the loose ends of a long scarf. Keep material arranged so it doesn’t obstruct breathing, vision, or helmet fit. Follow local guidance for lift safety and loose clothing.
The Canadian Ski Council’s helmet guidance emphasizes both fit and limitations. A helmet doesn’t eliminate concussion or other serious injury risk, and warm clothing doesn’t make unsuitable weather or terrain appropriate.
Adjust before discomfort takes over
Check the mountain forecast, including wind, precipitation, and conditions at elevation. The base-area temperature may not describe an exposed lift ride. Bring the layers you need to respond to a plausible change.
Vent or remove insulation before sustained overheating leaves the outfit damp. Add protection when you stop or become exposed. You don’t need to wait until you’re thoroughly uncomfortable before using the features you packed.
If clothing becomes wet, or you’re persistently cold, go inside and address it. Seek staff assistance for concerning symptoms or an inability to warm up. No outfit creates a requirement to remain outside until a ticket feels fully used.
Sun protection belongs in winter planning too. Snow and bright conditions can make exposed skin and eyes uncomfortable even when the air feels cold. Follow appropriate sunscreen and eye-protection guidance rather than using temperature as a measure of sun exposure.
Build the outfit without buying a second wardrobe
Lay out the system at home and try everything on together. Bend your knees, raise your arms, zip the jacket, and check the helmet-goggle fit. Small conflicts are easier to solve in a warm room than while the lesson group waits.
Use suitable existing wool or synthetic layers where they work. Borrow appropriate outerwear if it fits, and confirm what the resort rents. Don’t assume equipment rental includes clothing or goggles.
The REI clothing overview is useful for checking the categories, but your own conditions and fit should decide the final combination. Brand names and expensive technical labels aren’t a substitute for those basics.
The successful outfit is the one you can mostly stop thinking about. It leaves you warm enough when waiting, comfortable enough when moving, and free to concentrate on what the skis are doing. That’s a much better performance standard than looking ready for an expedition you’re not taking.