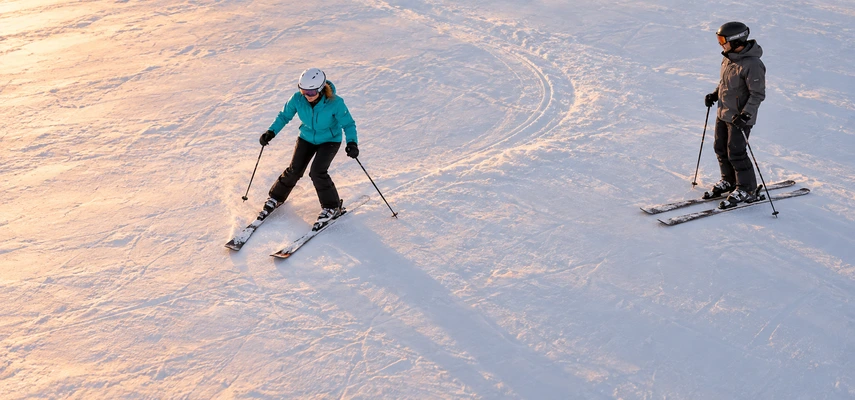

A first ski turn doesn’t need to be a sweeping arc across an alpine panorama. It may be a small change of direction on a very gentle slope, followed by a deliberate stop. That modest movement contains an important discovery: the skis can follow a path you choose.
The difficulty is that several instincts point in unhelpful directions. You may want to twist the shoulders, lean away from the slope, or command the skis by staring at them. A useful turn develops from coordinated movement of the feet and legs, supported by balance and appropriate contact with the snow.
Learn with an instructor on terrain selected for first turns, after establishing the necessary stopping and equipment skills. Keep the task short and manageable. Understanding the idea helps you interpret a lesson; it doesn’t make a busy run a suitable place to invent the movement.
Give the turn a small, clear objective
Begin with one direction change and a controlled finish rather than immediately trying to link a long sequence. The instructor can choose a starting direction, slope, and runout that make the task appropriate.
This reduces the number of decisions competing for attention. You can notice how the skis begin to turn, where the body is supported, and what brings the movement to rest. A long descent can hide those details beneath the urgent business of getting to the bottom.
Try both directions as directed. One may feel less natural, which is useful information rather than a reason to avoid it forever. Terrain, habits, equipment, and simple unfamiliarity can all affect the difference.
SkierLab’s isolated-turn progression uses this one-turn approach and emphasizes a short gentle setting. The task is deliberately small so the learner doesn’t need an advanced escape plan if the first attempt is incomplete.
Begin from a stance that permits movement
Use a comfortable separation between the skis, with the ankles, knees, and hips softly flexed. Remain supported through the feet rather than sitting behind them or folding the upper body sharply forward.
If your lesson uses a wedge, keep the tips separated and the tails farther apart without forcing an enormous triangle. The wedge is a platform for learning, not a contest in how far the boots can move away from each other.
Keep the hands comfortably available and look into the space you intend to use. Staring continuously at the tips makes it harder to notice the route and people ahead. Your instructor can help match the visual cue to the task.
Don’t start if the equipment feels wrong or you can’t stop appropriately in the selected setting. Ask for an adjustment to the task or a fitting assessment. Better turning doesn’t begin with quietly tolerating a problem that changes every movement.
Guide the skis with the feet and legs
Steering involves turning the legs to guide the skis, coordinated with balance and edge control. The skis need to remain able to move over the snow rather than being locked so firmly onto an edge that they resist the intended direction change.
Think of guiding two small pointers with your feet. The analogy is about direction, not forcing both skis to pivot abruptly. The movement should be gradual enough for you and the instructor to observe what is happening.
The REI beginner-turn explanation emphasizes steering with the lower body and using turn shape to manage direction. A large shoulder swing isn’t a substitute for that connection at the skis.
Different instructors may use different cues. One phrase may help you release an edge; another may help you turn the legs more smoothly. Ask what ski behavior the cue is intended to create, especially if two instructions sound contradictory.
Understand the outside ski without making it a stomp
The outside ski is on the outside of the turn’s curve. During a left turn, that is the right ski; during a right turn, it is the left. The name changes with the direction, not with the sticker on your rental equipment.
Many beginner progressions develop greater support through that outside ski as the turn develops. That can help organize the ski-snow forces that guide the path. It doesn’t require suddenly stamping on one foot or lifting the other ski into the air.
Stay coordinated and let the instructor show the amount and timing of the change. A small shift in support may be more effective than a dramatic lean. Your body still needs a useful relationship with both moving feet.
The PSIA-AASI Eastern wedge-turn description combines leg steering, edge release, and outside-ski support. The lesson is coordination, not choosing one isolated ingredient and adding as much of it as possible.
Let the turn develop before judging it
A turn takes time and space. If you begin steering and immediately abandon the movement because the skis haven’t changed direction enough, you may never give the intended path a chance to appear.
The instructor can select a task in which a gentle, continuing direction change brings the skis farther across the slope. That finish changes the relationship between your movement and gravity and can help the turn end calmly.
Don’t interpret patience as permission to continue an uncontrolled slide. It belongs inside a suitable supervised setting with a manageable starting point and runout. If the task exceeds your control, reduce it.
Afterward, ask what you observed. Did both skis change direction? Did the body move with them? Did you feel one leg bracing? Specific observations are more useful than simply declaring the entire turn good or bad.
Separate a turn from a body twist
Turning the shoulders toward the destination is understandable because it works for many everyday actions. On skis, it can rotate the upper body without creating the useful lower-body steering you need.
A quieter torso can leave the legs room to guide the skis beneath it. Quiet doesn’t mean rigid or permanently facing one compass direction. It means avoiding a large upper-body movement that overwhelms the task.
The distinction becomes easier to learn with demonstration and feedback. An instructor can show a modest movement and watch whether you’re copying the purpose or only the visible outline.
If the cue makes you tense, simplify the task rather than adding more instructions at once. One clear change practiced on easy terrain often produces more understanding than a mental checklist long enough to require its own lift ticket.
Make room for the less comfortable direction
Most learners notice some difference between left and right turns. Don’t diagnose it as a permanent weakness from the first few attempts. Ask the instructor to compare stance, support, steering, and the terrain in each direction.
Practice the task at a level where the less comfortable side remains manageable. Repeating only the easy direction may feel productive while leaving a gap that becomes obvious when you try to descend a whole run.
Avoid compensating with an increasingly forceful shoulder swing or a sudden push against one ski. A different starting direction or smaller task may reveal the needed movement more clearly.
If one boot hurts or a particular movement causes pain, stop and seek an assessment. Technique feedback and equipment fit are different questions, and neither improves by pretending the other doesn’t exist.
Link turns only when the separate tasks are ready
Once you can turn and stop appropriately in both directions, the instructor may introduce a transition from one turn into the next. That adds timing: the previous turn must release enough for the new direction change to begin.
You don’t have to rush through the downhill part or force an immediate reversal. The task is to create manageable connected paths, with speed staying within your control. The instructor can choose a progression that makes the transition understandable.
Some learners remain in a wedge; others begin to match the skis at different points. Parallel appearance isn’t the only measure of success. Direction, balance, speed, and a reliable finish still matter.
Don’t move onto a longer run merely because two turns connected once. Look for repeatable performance and ask whether your current stopping skill and conditions support the next terrain choice.
Recognize when the setting is the problem
A slope can be too steep, too crowded, too firm, or too narrow for the movement you’re learning. An excellent verbal cue cannot remove those demands. Change the setting before deciding that more effort is the answer.
Fatigue can also make steering stiff and reduce attention. If the task becomes less controlled, take a break or return to something simpler. End the session before repetition becomes a series of increasingly desperate corrections.
Choose practice space that respects others. Look uphill before setting off, avoid people ahead, and stop in a visible place without obstructing the route. The NSAA responsibility code applies to learning as well as to polished skiing.
Professional feedback is particularly useful when one problem repeats or you can’t tell what caused a successful attempt. A viewer can identify the movement that matters instead of letting you build a theory from one accidental result.
Notice the moment the path becomes intentional
The first satisfying turn often feels smaller than expected. You don’t need a heroic lean. The feet guide the skis, the support shifts appropriately, and the path bends without a wrestling match.
Ask the instructor for one useful cue to carry into practice and a precise description of suitable terrain. Keep the task within that recommendation rather than testing how much harder you can make it before it stops working.
The goal is a dependable relationship between movement and result. Once a turn happens because of a choice you understand, repetition has a purpose. You are no longer just sliding toward the bottom; you’re beginning to draw the route there.