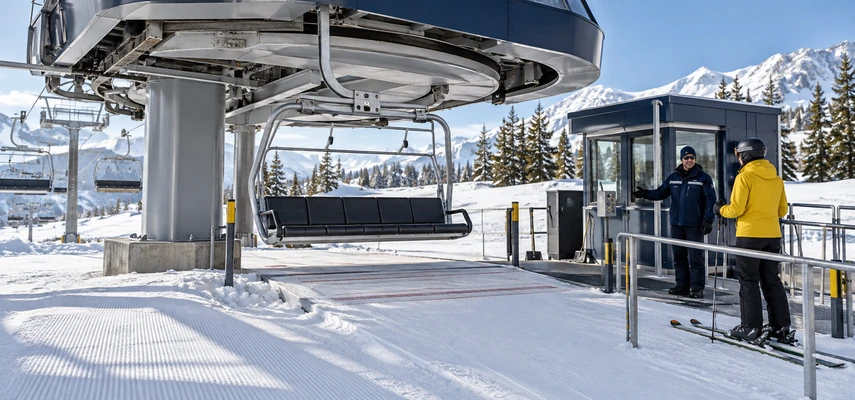

A ski lift solves the uphill problem so efficiently that it’s easy to forget it introduces a new skill. You must join a moving system, ride it appropriately, and leave in the right place—often while wearing long objects that aren’t especially interested in tight corners.
The process becomes familiar with instruction and practice. The important first step is to ask for help before joining the loading sequence, not to improvise because everyone behind you appears experienced.
Different installations have different arrangements. Use this guide to understand the main ideas, then follow the signs, attendant directions, and instructor demonstration for the lift in front of you. If you need an accommodation or specialist assistance, discuss it with the operator in advance where possible.
Check the destination before the queue
A lift takes you somewhere, and that destination needs an appropriate way down. Before boarding, know which open route suits your current stopping and turning ability. The easiest run from one lift may still be too demanding for a first-time skier.
Don’t treat the ride as a sightseeing decision separate from the descent. Ask staff whether downloading is permitted if that matters to your plan. Permission and operating arrangements vary; never assume you can remain aboard or ride down without checking.
Use beginner lifts when your instructor recommends them. Moving higher isn’t a learning milestone unless the terrain and your skills make sense together. A short carpet ride can be exactly the right transportation for a productive lesson.
The NSAA responsibility code requires knowing how to load, ride, and unload safely and asking the attendant for help when needed. That responsibility begins before the gate.
Prepare loose items before loading
Secure clothing and equipment so straps, bags, and loose ends won’t catch. Remove a backpack from your back for a chairlift and carry it as the operator directs, commonly in your lap. Don’t leave the adjustment until the chair is arriving.
Remove pole straps from the wrists and hold the poles as instructed so they don’t interfere with loading or neighboring riders. Put the phone away and keep attention on the operation.
Tell the attendant that you’re new and describe any assistance you need. They can explain the timing and available help for that installation. Don’t assume a request to slow the lift is always handled the same way everywhere.
Technical Safety BC’s chairlift guidance identifies distraction and caught items among common problems. Good preparation removes tasks that would otherwise compete for attention at the busiest moment.
Join the loading sequence deliberately
Follow the maze, gates, waiting line, and staff signals. Organize your party according to the chair’s capacity and local instructions. If you aren’t ready, tell the attendant rather than trying to rescue a rushed approach.
Move to the indicated loading position when directed. Keep the skis arranged as shown, watch the approaching chair, and sit as the seat reaches you. Your instructor or attendant should demonstrate the specific sequence before your first attempt.
Sit fully back on the seat rather than perching forward. Keep equipment clear of neighboring riders and the loading area. Don’t twist around for a conversation or try to retrieve something while the chair moves away.
The Finnish Ski Area Association’s chairlift instructions describe this coordinated waiting, loading, and seated approach. Treat the local layout as authoritative; gates and conveyor-assisted loading can change the details.
Use the bar according to the lift’s system
Once everyone is properly seated, lower a manually operated restraint bar as directed, communicating with the other riders first. Move it carefully so people can prepare their heads, hands, and equipment.
Keep the bar down during the ride and raise it only at the indicated point, following signs and instructions. Some installations have automatic or locking systems, so don’t force a mechanism because you’re accustomed to a different lift.
Big Sky’s official guidance provides examples of different bar arrangements on different lifts. That variation is why a general instruction needs a local check rather than a universal countdown to the top.
The bar is part of appropriate riding behavior, not a reason to bounce, lean out, or stop paying attention. Remain seated properly and keep children supervised according to the operator’s requirements.
Ride calmly and leave dropped objects alone
Keep skis and poles steady and avoid interfering with other riders. Don’t rock the chair, throw objects, turn around, or shift into a position that compromises your seat.
Avoid equipment adjustments that can wait until you’re safely off the lift. A glove, phone, or pocket opening can become an unnecessary distraction while you are suspended above the snow.
If something falls, let it fall. Don’t reach out or attempt to leave the chair to retrieve it. Tell staff afterward and follow their instructions about recovery. A replaceable object shouldn’t become a reason to leave a secure seated position.
If the lift stops, remain seated and follow announcements or staff directions. Don’t attempt a self-evacuation. A stopped lift is an operational situation for trained personnel, not an invitation to invent a way down.
Prepare for unloading before you arrive
Watch for the posted preparation and unload instructions. Secure loose items, arrange skis and poles as shown, and coordinate with the people beside you so your intended paths don’t conflict.
Raise a manual bar only at the directed point and with care. Keep ski tips appropriately positioned to avoid catching on the ramp. Follow the instructor’s demonstration of when to stand and glide away.
At the designated unload point, rise smoothly and travel clear of the chair’s path and unloading ramp. Don’t stop immediately to celebrate, consult the map, or gather the group. The next chair needs the same space.
If something goes wrong, alert the attendant and follow their directions. Don’t turn back into moving machinery to recover an item. Knowing that help is available makes more sense than trying to solve every unexpected event alone.
Moving carpets keep the skis on the surface
A moving carpet is a conveyor commonly used in learning areas. You stand with your equipment arranged as instructed while the belt transports you uphill. It can be a useful introduction to lift timing without an elevated chair.
Wait for the attendant’s signal and spacing instructions, move onto the belt as demonstrated, and remain in the required position. Keep loose clothing and equipment away from machinery and belt edges.
At the top, leave at the designated point and clear the exit promptly. Don’t remain there while deciding which way to go. Ask the instructor to explain the next movement before boarding if you’re unsure.
Quebec’s ski area association provides separate guidance for different lift types. A carpet may feel simple, but it still has a loading process, an exit, and installation-specific instructions worth learning.
Surface tows pull while you remain on skis
T-bars, button or platter lifts, and rope tows transport skiers along the snow rather than carrying them on a chair. Each has its own grip or support arrangement and release procedure.
For a T-bar or platter, the device pulls you uphill; it isn’t a chair to sit down on. Maintain the stance and ski track the instructor demonstrates, and avoid steering out of the designated route.
If you fall or lose the tow, release it as instructed and clear the track safely. Don’t try to recover the device or travel across the active line without staff guidance. Ask what to do before the first ride so the response isn’t a surprise.
The Finnish association’s T-bar instructions show why these lifts deserve their own demonstration. Being familiar with a chairlift doesn’t automatically teach the different balance and handling required for a tow.
Gondolas change the equipment routine
Gondolas use enclosed cabins, often with a different boarding process from a chairlift. Depending on the installation, skis may go in an external rack or be carried inside according to staff instructions.
Remove skis where directed, carry them carefully through the queue, and let the attendant explain the rack or cabin arrangement. Don’t force unfamiliar equipment into a holder or leave tips and poles where they obstruct doors or passengers.
Board and leave at the designated stations, with attention to the moving platform or cabin system. Keep doors and exits clear. The enclosure doesn’t remove the need to follow operational instructions.
Confirm whether pedestrian access, downloading, or particular equipment is permitted for your planned trip. A gondola can serve several activities, but its access rules and destinations still need checking.
Make the first ride a learning task
Ask the instructor to explain loading, riding, unloading, and the route afterward before you join the line. If useful, rehearse the relevant movements in a safe stationary setting selected by the school.
Keep the task manageable and say when you don’t understand a step. An unfamiliar lift on a later trip deserves the same question even if you’ve ridden many others. Experience helps you recognize differences; it doesn’t make them disappear.
Lift skills support skiing because they get you to appropriate terrain without adding avoidable confusion. Prepare the equipment, pay attention to the operator, and clear the exit. Once the routine is familiar, the uphill journey can become what you hoped for: a chance to look at the mountain and think about the next controlled run.