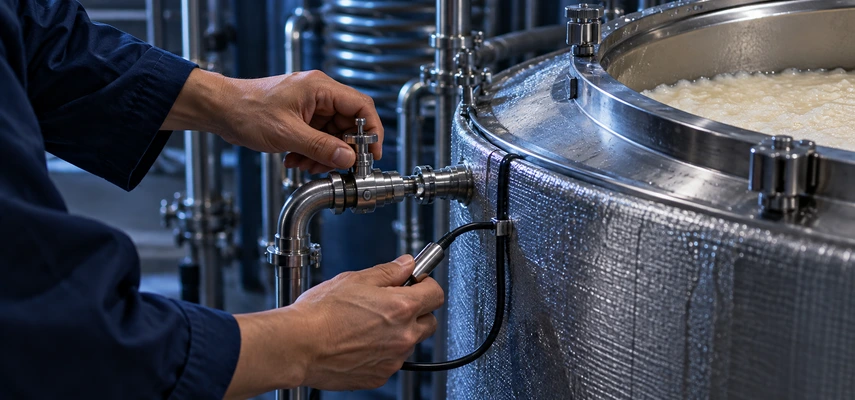

Is colder fermentation always better? Only if “better” means ignoring what the brewer is trying to make. Fermentation temperature changes the conditions for yeast and enzymes, while the time spent under those conditions shapes how the mash develops. A cool, prolonged course can support one style; another carefully managed course can support a different, equally deliberate result.
The WSET Level 3 specification requires temperature management, the relationship between temperature and style, and stopping fermentation. Study these as connected decisions. The useful question isn’t which temperature deserves a medal, but how a chosen course helps the brewery reach an intended balance of aroma, taste, texture and alcohol.
Fermentation temperature affects a coupled system
In moromi, kōji enzymes make rice material available and release sugars while yeast consumes fermentable sugar. Temperature affects both sets of activities, although not necessarily in the same way or to the same extent. Changing it therefore alters a relationship between processes, rather than moving one isolated speed control.
Yeast also generates heat during fermentation. A large active mash can warm even when the surrounding room is cool. The NRIB account of sake fermentation describes temperature management within the brewing process. Cooling equipment and observation help control the actual material, not simply the room’s air.
Consequently, a temperature target needs a method of measurement and a plan for responding. A single reading cannot describe the full fermentation history or establish that every part of a tank has behaved identically. The brewer follows a course over time, considering the mash’s development alongside the temperature record.
Cooler conditions commonly slow the process
Within useful brewing conditions, lower temperatures commonly slow fermentation and can extend the time needed for a chosen course. This is one reason cool ginjō production is associated with prolonged fermentation. However, “slow” describes a rate; it doesn’t independently assess quality. A sluggish process caused by an unsuitable environment is not the same achievement as deliberate control.
The NRIB and JSS guide describes lower-temperature approaches and longer fermentation as useful production context. Its examples shouldn’t be turned into one mandatory timetable. Yeast strain, rice behavior, enzyme supply, nutrients and the temperature trajectory all affect how a particular mash develops.
Time and temperature also interact with the material left to ferment. If sugar release changes as rice dissolves, the yeast isn’t working with an unchanging supply. The brewery therefore assesses the actual course rather than assuming that an extra day always produces the same increment of alcohol or the same change in sweetness.
Aroma formation depends on yeast and its environment
Yeast produces aroma compounds through metabolism. Esters are especially useful in explaining fruity ginjō impressions. The National Tax Agency’s components overview identifies isoamyl acetate with banana-like aroma and ethyl caproate, also called ethyl hexanoate, with apple-like aroma. These are examples of compounds, not compulsory descriptors for every sake.
Temperature affects the environment in which those compounds are formed and retained. A chosen yeast may be managed through a cool course as part of an aromatic production strategy. However, yeast selection and nutrition remain essential. The correct chain includes metabolism, not simply “cold rice acquires fruit smell.”
Likewise, the final concentration of an aroma compound reflects more than its production at one moment. The whole fermentation and subsequent handling contribute to what reaches the glass. Avoid claiming that progressively lower temperature must always increase every ester. Different compounds, strains and conditions do not respond as one interchangeable aromatic category.
Acidity is a separate result, not a synonym for temperature
Yeast metabolism contributes organic acids, and starter history also affects the acidic environment. Temperature and duration interact with those processes. Yet a warm-versus-cool comparison doesn’t establish the same acid outcome for every strain and recipe. “Warmer means more acidic” is too absolute to replace a supported explanation of the actual system.
Acidity also needs interpretation in the finished palate. A measured acid concentration and the sensation of balance are related but different questions. Sweetness, alcohol, umami and aroma influence how a sake is experienced. A brewer can pursue a more pronounced acid impression deliberately rather than treating every increase as a failure.
Therefore, keep the analytical and sensory claims separate. State what process factor could influence acid production, then explain how the resulting balance must be assessed. The same reasoning prevents a learner from using a pH value alone as a complete tasting note or from describing every low-acid sake as automatically delicate.
Alcohol and residual sugar develop through time
Alcohol accumulates as yeast consumes fermentable sugar. Meanwhile, enzymes continue making material available, and yeast faces changing conditions including rising ethanol. The eventual concentration depends on the whole course, ingredient balance and decisions about when to proceed to separation and later adjustment.
Residual sugar at a particular point represents what remains after production and consumption have interacted. It is not simply the amount of rice added at the beginning. A longer fermentation may permit further consumption, but only where yeast and conditions support it. Extending time doesn’t force an unlimited increase in alcohol or guarantee complete dryness.
The JSS brewing process account places fermentation before pressing and later alcohol adjustment. Keep fermentation-derived alcohol separate from deliberately added brewing alcohol and post-fermentation dilution. Similar final alcohol percentages can result from different histories, so the number doesn’t reconstruct the process by itself.
Two hypothetical plans show why the objective matters
Imagine a brewer pursuing a fragrant, refined sake. The plan could combine suitably polished rice, a chosen kōji contribution and an aromatic yeast with a cool, controlled fermentation. Slower development gives a different management problem from a faster course. The brewer monitors whether the desired balance develops rather than assuming the plan’s prestigious vocabulary guarantees success.
Now imagine a fuller sake intended to show a more substantial palate and savory character. The brewery may select different rice preparation, kōji and yeast, then manage a temperature course that suits that material. The point is not to ferment carelessly at a higher temperature. It is to align the biological conditions with another legitimate sensory objective.
Both plans require control. The first isn’t good merely because it is cool; the second isn’t inferior merely because its course differs. The quality question concerns how well the result expresses its intended style with balance and appropriate persistence. Production reasoning explains the route, while tasting provides evidence about the outcome.
Monitor a trajectory rather than one attractive number
Useful observations include temperature, the changing composition and condition of the mash, fermentation activity and sensory development. A brewery evaluates trends and relationships. For example, a change in activity alongside a temperature change has a different meaning from the same activity change without one. Context turns measurements into information.
Density-based readings also need care because alcohol and dissolved material both influence the system. They shouldn’t be confused with a direct glucose assay or a complete flavor prediction. Likewise, visible foam is affected by yeast characteristics; a low-foaming strain can ferment actively without producing the same surface appearance as another strain.
When explaining process control, identify what the brewer observes and which adjustment addresses the suspected cause. A cooling change responds to a thermal problem; it doesn’t automatically correct every nutritional or substrate issue. The word “management” becomes meaningful when attached to a specific measurement and intervention.
For example, imagine activity slows after an unusually cold addition. That thermal history gives a reason to investigate temperature before blaming the yeast strain. In another hypothetical batch, the temperature follows the intended course but sugar availability is limited. The same visible slowdown would then call for a different investigation. These examples explain why control depends on relationships between observations, rather than matching every symptom to one automatic response.
Ending moromi is a production decision
The brewer chooses when the mash has reached the desired development and moves toward pressing and finishing. Cooling can slow activity, and some production plans include added brewing alcohol before pressing, which changes yeast conditions. Those operations should be explained within the actual method rather than as one universal stop button.
Pressing separates sake from much of the solid material and changes the fermentation system, but it isn’t the same as proving that no viable yeast or active enzyme remains. Later pasteurisation and other stability decisions address additional concerns. This is particularly important when considering unpasteurised sake, which still requires appropriate handling.
For a causal answer, state the target, the observed development and the reason for moving to the next stage. Don’t claim all fermentations stop after a fixed number of days. A schedule organizes production; the condition of the material determines whether the intended result has actually been reached.
Fermentation management connects the yeast potential with the developing main mash. Compare the resulting expression with ginjo production choices, keeping a temperature tendency separate from a guaranteed aroma.
One-page revision summary
Temperature influences yeast and enzyme activity within a changing mash. Cooler, longer approaches can support aromatic styles, but no single regime guarantees quality, acidity or alcohol. Follow glucose production and consumption, monitor the course and distinguish process readings from sensory conclusions. Finally, explain ending moromi through deliberate transition to pressing and finishing, rather than an imaginary universal timer.
Written practice: original TFE exercises
These suggested marks and indicative points are independent teaching guidance, not official WSET marking schemes.
Exercise 1: 5 suggested marks
Explain why a cooler fermentation course can be part of an aromatic sake strategy but does not guarantee higher quality. Mapping: Unit 1 LO1 and LO2.
Indicative marking points:
- Temperature affects yeast metabolism and enzyme activity.
- Cooler conditions commonly slow the fermentation course.
- The course can work with aromatic yeast and suitable raw-material management.
- Other inputs and conditions affect the eventual result.
- Quality needs sensory evidence of the actual sake rather than the temperature label.
Model answer: Cooler conditions commonly slow fermentation and alter the environment in which yeast produces aroma compounds. With suitable rice, kōji and yeast, that course can support an aromatic style. However, the outcome still depends on the complete process and the final balance. A temperature description therefore explains a strategy without establishing high sensory quality by itself.
Why it works: It connects a temperature decision to biological behavior and a conditional style objective, then separates that from evaluation.
Common mistake: Writing that the coldest possible mash must produce the best sake or the most of every ester.
Exercise 2: 5 suggested marks
Explain why neither elapsed time nor pressing alone should be described as proof of complete biological stability. Mapping: Unit 1 LO1.
Indicative marking points:
- Fermentation development varies with ingredients and conditions.
- A fixed duration does not establish the same endpoint.
- Pressing separates liquid from much of the solid material.
- Viable yeast or active enzymes may remain.
- Further finishing and appropriate handling address stability according to the product.
Model answer: Different fermentation conditions produce different rates, so the same elapsed time need not mean the same development. Pressing then separates liquid from much of the mash solids, changing the system without proving that every yeast cell or enzyme is inactive. The brewery must make further stability and handling decisions, including the relevant pasteurisation approach where used.
Why it works: It distinguishes scheduling, physical separation and biological stabilization as separate questions.
Common mistake: Treating pressing as identical to pasteurisation or saying all sake stops changing after a fixed number of days.
Knowledge check: 10 original practice questions
Independent TFE questions, not official WSET examination items. Choose one answer per question; explanations follow separately.
1. Which pair correctly associates a compound and familiar aroma description?
2. Which statement best describes temperature’s role in moromi?
3. What makes a monitoring record useful?
4. What does pressing primarily do?
5. Which statement about two differently managed styles is defensible?
6. Which is a common consequence of cooler conditions within a useful brewing range?
7. What is another name for ethyl caproate?
8. Why is one residual-sugar reading not the complete fermentation story?
9. Why can the mash warm during fermentation?
10. Which interpretation of acidity is strongest?
Answers and explanations
1. D — Isoamyl acetate and banana-like aroma.. Isoamyl acetate is a recognized banana-like ester; the association is not a guarantee for every sake. Mapping: Unit 1 LO1 Range 4; LO2 Range 4.
2. A — It affects yeast and enzyme activity within a coupled system.. The mash contains interacting processes whose rates and behavior respond to conditions. Mapping: Unit 1 LO1 Range 4; LO2 Range 4.
3. D — Following trends and interpreting measurements with the relevant conditions.. Context and trajectory help explain the process rather than treating one reading as a complete diagnosis. Mapping: Unit 1 LO1 Range 4; LO2 Range 4.
4. A — Separate sake from much of the mash solids.. Physical separation changes the system but is not identical to complete biological stabilization. Mapping: Unit 1 LO1 Range 4; LO2 Range 4.
5. C — Each needs a process suited to its objective and sensory evidence for quality.. A controlled strategy is assessed through suitability and the actual result, not a universal temperature ranking. Mapping: Unit 1 LO1 Range 4; LO2 Range 4.
6. B — Slower fermentation and a potentially longer course.. Cooler conditions commonly slow the process, but duration and outcome depend on the complete system. Mapping: Unit 1 LO1 Range 4; LO2 Range 4.
7. A — Ethyl hexanoate.. The same ester name can appear in two forms, relevant to discussing apple-like ginjō aroma. Mapping: Unit 1 LO1 Range 4; LO2 Range 4.
8. C — Sugar release and consumption both contribute to the measured pool.. A standing pool reflects a changing balance rather than simply the amount of rice initially added. Mapping: Unit 1 LO1 Range 4; LO2 Range 4.
9. C — Yeast metabolism releases heat.. Biological heat production is a reason to manage the material temperature rather than only the room. Mapping: Unit 1 LO1 Range 4; LO2 Range 4.
10. B — Production influences acid composition, while sensory balance also depends on other palate components.. Analytical measures and sensory balance are related but distinct questions. Mapping: Unit 1 LO1 Range 4; LO2 Range 4.