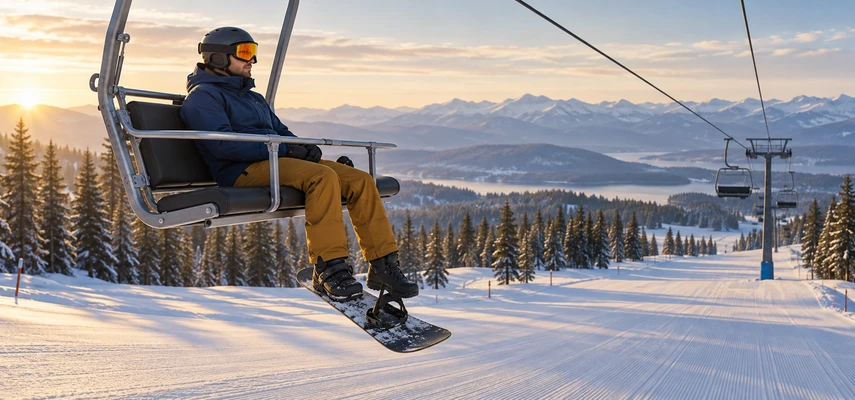

A chairlift is a transport system with an unusually personal boarding procedure. You bring a long board attached to one foot, share a moving seat with other people and then stand up at precisely the place designed for it. The useful preparation is considerably less dramatic than that description sounds.
Learn the process with an instructor and tell the attendant you’re new before entering the loading area. Chair designs, approach systems and unloading ramps differ. This guide explains the common sequence and the decisions around it; local signs and staff instructions govern the actual lift.
The aim isn’t to look experienced in the queue. It’s to arrive with the necessary one-foot control, understand the next steps and ask for help while there’s time to organize it. A short conversation at the bottom can prevent a much more confusing conversation halfway through boarding.
Confirm that this is the right lift
Before joining the line, ask what terrain the lift serves and whether you can manage a suitable route down. A beginner-looking chair doesn’t guarantee a beginner descent. Trail ratings are relative within a resort, and weather or snow conditions can change the task.
Your instructor should assess readiness for loading and unloading. Controlled skating, short one-foot glides and stopping in an appropriate setting are useful preparation. Being able to push across level snow isn’t the same as being ready for every unloading ramp.
Ask whether a stationary practice chair is available. Rehearsing the seating and bar sequence without a moving lift can clarify the equipment before you enter the queue.
The NSAA Responsibility Code requires knowing how to load, ride and unload lifts and asking attendants for assistance when needed. That requirement puts communication inside the skill, not outside it. You don’t have to hide uncertainty to be a legitimate snowboarder.
If you’re learning with access needs or require a particular loading arrangement, discuss it with the school and lift staff in advance. Different equipment and assistance procedures may apply. Don’t improvise an adaptation in a moving loading lane.
Organize equipment before the final approach
In a typical beginner chairlift procedure, the front boot stays attached and the rear boot is released. Confirm that the attached boot is secure and that loose straps won’t interfere with movement. Keep the board controlled while you wait.
Secure loose belongings and remove a backpack as instructed before boarding. Straps and dangling items can become entangled, and a pack behind your back can prevent sitting fully into the chair. Plan how you’ll hold it without occupying the space you need to sit safely.
Keep your attention on the process. Put away a phone and finish clothing adjustments before the loading point. Ski California’s mountain safety guide emphasizes preparation, proper seating and attention through loading, riding and unloading.
Talk to your instructor or companions about positions and the intended exit direction. People with different stances may need to coordinate board space, but the attendant’s instructions and available chair arrangement determine what happens. Avoid turning general advice about which side is easier into a rule for every lift.
Tell the attendant what you need
Approach the attendant before the final loading movement when possible and say clearly that you’re a first-time rider. Ask how to line up, when to advance and what to do if the attempt doesn’t work. Staff can explain the specific system and available assistance.
A lift may be slowed or stopped when staff judge it appropriate, but don’t assume a particular request is automatically available in every situation. Communicate early and follow the instruction you receive. Other passengers also need time to understand the plan.
Wait at the marked position or gate and advance only as directed. Keep the board aligned with the intended loading path and use compact one-foot movement. The space is designed for a sequence; rushing ahead doesn’t improve your place in it.
If confusion develops before boarding, tell staff rather than trying to resolve it through a hurried last-second maneuver. Following the loading procedure correctly matters more than making the next chair at all costs.
Sit into the chair rather than chasing it
At the designated loading point, follow the attendant’s guidance about looking back, positioning and sitting. Let the seat take your weight as it reaches you. Sit fully back, keeping equipment clear and maintaining attention to the chair and other passengers.
Don’t attempt to hang onto a chair if you haven’t seated properly. Alert the attendant and follow instructions. A failed load is a situation for staff assistance, not an invitation to invent a different way of being carried uphill.
Once everyone is correctly seated, communicate before lowering the restraint bar so it doesn’t strike another rider or equipment. Use it as directed by the resort. Keep the board positioned so it doesn’t interfere with neighboring equipment or the mechanism.
The exact sequence depends on the lift. Automatic features, gates, seat designs and bars vary. This is why watching one video or recalling another resort’s arrangement can’t replace attending to the signs in front of you.
Ride seated and let the equipment remain predictable
Stay properly seated throughout the ride. Avoid bouncing, rocking, reaching out or turning the chair into a place to rearrange all your belongings. A restraint bar is an important part of the riding procedure; it isn’t permission to behave carelessly.
Your board may hang from the attached foot or be supported using the lift’s approved footrest arrangement. Ask how to position it without crossing another rider’s skis or board. Don’t force equipment into an awkward position simply because someone else’s setup fits a footrest differently.
Technical Safety BC’s chairlift guidance emphasizes correct riding behavior and unloading only in the designated area. If the lift stops, remain seated and wait for instructions. Don’t jump off because the ground looks close or because another rider suggests it.
If you drop something, let it go and ask staff afterward how recovery is handled. Reaching beyond the chair for an object changes a minor inconvenience into a much more serious problem. Your phone can wait for the appropriate conversation with mountain personnel.
Prepare for unloading before you reach it
Watch the signs and the approaching station. Keep attention on the procedure rather than waiting until the chair arrives to begin thinking about it. Discuss the exit plan with companions while remaining seated and following local directions.
Keep the bar down until the designated point and raise it when signs or staff instruct. Communicate with other passengers before moving it. Different lift systems use different arrangements; don’t copy the timing of a distant chair without checking the actual signal.
Position the board as instructed, with its leading end clear of the approaching ramp. The rear foot will need the stable resting position you’ve practiced for one-foot gliding. You should understand that placement before the chairlift ride, not discover it as the board touches down.
If you become uncertain, communicate with staff when you can and follow their directions. Don’t stand prematurely or jump toward the unloading surface. The designated unloading point exists to match the chair’s movement with the ramp.
Stand, glide and clear the exit
At the marked unloading point, follow the taught movement to stand and glide away. Put the free foot into its practiced resting position on the board and look along the clear exit route. Keep the movement controlled rather than trying a sharp turn immediately beside the chair.
Continue to the appropriate clear area before stopping to secure the rear binding. People behind you also need space to unload. Breckenridge’s lift-safety information reinforces the need for passengers to be capable of the loading and unloading process.
If you fall in the unloading area, follow staff directions and move clear if you can do so safely. Don’t prioritize collecting every loose item over clearing a moving-lift path. The attendant can stop or manage the lift and help organize the situation.
If you miss the unloading point, remain seated and seek staff assistance rather than jumping off afterward. A late leap isn’t a second chance at the same maneuver; it’s a different and potentially dangerous situation outside the intended exit.
Make the next ride easier through specific practice
After the first ride, identify what actually felt difficult. Was it lining up, sitting back, placing the free foot or maintaining direction on the exit? Those are separate tasks, and the instructor can target the one that needs work.
Practice appropriate one-foot glides away from traffic if unloading balance needs attention. Review the signs and sequence if timing was confusing. A short targeted reset is more useful than repeatedly joining the queue while hoping the next attempt will feel different.
Know when to pause. Fatigue, equipment discomfort or repeated loss of control can make a previously manageable movement unreliable. Ask for assistance and return to suitable practice rather than allowing companions’ plans to set your pace.
Eventually the chairlift becomes a familiar part of the day: prepare, communicate, sit correctly, pay attention and clear the exit. It never needs to become a test of nerve. The useful skill is following a predictable process while leaving room to ask for help.