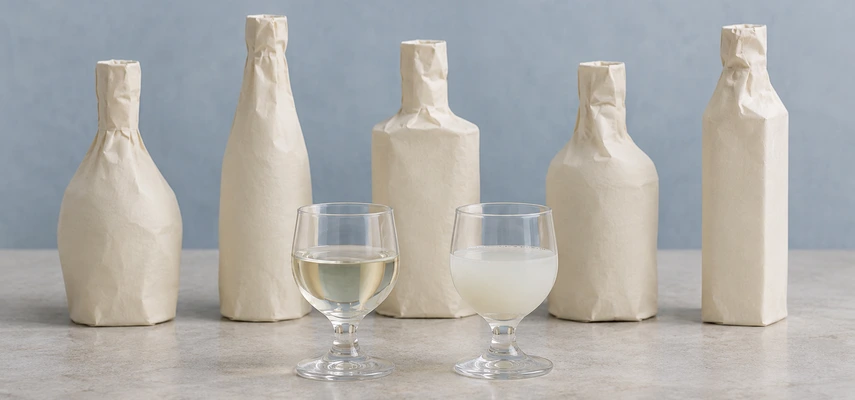

Blind tasting sake asks you to connect what you perceive with a plausible production explanation. The useful question isn’t whether you can perform a dramatic bottle reveal. It’s whether your conclusion follows from the observations, survives reasonable alternatives and stays within what sensory evidence can establish.
The Level 3 specification identifies five relevant technique groups: ginjo, nama-zake, yamahai or kimoto, nigori and koshu. They aren’t five mutually exclusive boxes. One sake can combine more than one of these features, so a practice session should allow overlapping explanations.
Build a reliable blind tasting sake session
Ask a tutor or partner to conceal the labels and keep a confidential record of the identities, production information and storage. Use neutral glassware, appropriate comparable temperatures and modest pours. Make a complete descriptive note before seeing the answers. The reveal should test the reasoning rather than supply the first description.
Choose contrasts deliberately. A well-matched pasteurized and unpasteurized pair can teach more about heat treatment than two unrelated bottles with completely different sweetness and alcohol. Perfect matching isn’t always possible, so record the variables that differ instead of pretending the exercise is a controlled scientific experiment.
Use the official Level 3 tasting reference for exact descriptive options. These original hypothetical cases illustrate reasoning only. They aren’t actual bottle notes, official exam answers or claims that every example of a technique must taste this way.
Use observation, mechanism, conclusion and alternative
Write the observation in sensory language first. Next, explain a relevant production mechanism from your theory knowledge. Then state the most plausible conclusion and one important alternative. This sequence turns a hunch into a short, reviewable argument.
For example, developed nutty and dried-fruit character with amber color can support maturation. The mechanism involves chemical changes during storage; temperature and duration influence their expression. The conclusion may be koshu, but the condition and intended style still need assessment because deterioration can overlap with developed aromas.
Keep confidence proportional to the evidence. Several coherent observations are usually more useful than a single descriptor. Even a convincing category inference doesn’t identify the exact rice, yeast number, prefecture or age. Those facts normally require documentary confirmation rather than a more confident tone of voice.
Practical station 1: ginjo technique
Use an aromatic ginjo-style example and a less fruity comparison. Keep the labels hidden until both notes are complete. Assess the nose and palate separately, recording the actual expression of fruit, flowers, cereal character, body and finish.
Hypothetical case: a clear pale sample shows distinct apple, pear and blossom, with delicate texture and a clean continuation. These observations are compatible with ginjo brewing. Selected yeast, carefully managed koji and cool fermentation can favor the intended aromatic expression, as discussed in the JSS process guide.
Model conclusion: ginjo technique is plausible because the defined fruity and floral character and delicate palate fit that production approach. A fruity profile alone doesn’t prove a legal designation or a particular polishing percentage. Other choices and styles can also produce expressive fruit.
Review task: identify which parts of your note support the inference and which are merely compatible background. After the reveal, explain why an unexpected result doesn’t automatically mean your nose failed. Production tendencies overlap, and the same technique can produce varied expressions.
Practical station 2: nama-zake
Compare an unpasteurized sake with a suitable pasteurized counterpart where available. Store and serve them according to producer guidance before the exercise. A damaged nama sample teaches deterioration rather than a clean comparison of the intended effects of heat treatment.
Hypothetical case: one sample appears particularly lively, with fresh fruit, a little retained gas and a vibrant palate. These may support nama as a possibility. Avoid claiming that any one feature proves the absence of pasteurization: pasteurized sake can also retain freshness or show bubbles.
Model explanation: omitting pasteurization leaves enzyme activity and microbial stability more dependent on subsequent handling. The resulting sensory expression varies with the whole brewing and storage process. Nama means unpasteurized, while once-pasteurized terms describe different heat-treatment histories; they aren’t interchangeable answers.
Review task: divide your written answer into observed freshness and documented heat treatment after the reveal. If the sensory clue was weak, say so. Recognizing uncertainty is better training than rewriting the original note so that the revealed label suddenly seems inevitable.
Practical station 3: yamahai or kimoto
Arrange a kimoto or yamahai example against a suitable sokujo comparison. If possible, include a refined ginjo example made with a traditional starter. That second comparison helps expose the mistaken belief that every traditional starter must produce a rustic, heavy sake.
Hypothetical case: a sample shows dairy-like and savory complexity, firm acidity and a substantial palate. These characteristics can be compatible with a kimoto or yamahai starter. They are not a guaranteed fingerprint, and successful examples may express those features much more subtly.
Model explanation: these starter approaches develop acidity through lactic acid bacteria rather than simply adding prepared lactic acid as in sokujo. Their longer microbial development can influence composition and style. Kimoto includes the traditional mashing work; yamahai omits that step. The difference doesn’t create a universally recognizable sensory dividing line.
Review task: explain the starter mechanism without claiming that sourness proves a named method. Excessive sourness may have other explanations, including condition. A broad yamahai or kimoto inference can be defensible even when distinguishing the two blind would be unjustified.
Practical station 4: nigori
Observe a deliberately cloudy example before smelling or tasting it. Follow the producer’s handling instructions; sediment distribution can change appearance and texture. Don’t assume every product should be shaken vigorously, especially if it may contain pressure.
Hypothetical case: a white cloudy sample contains visible retained rice material and has a textured palate. Nigori is the strongest production inference among the five stations because the retained material supplies direct visual evidence. Still describe the actual sweetness, alcohol and body rather than filling them in from the appearance.
Model explanation: coarser separation allows fine rice-derived solids to remain in the finished sake. This differs from a claim that it has never undergone the legally relevant separation process. Nigori can be dry or sweet, sparkling or still, pasteurized or unpasteurized; cloudiness doesn’t answer those separate questions.
Review task: identify a second possible explanation for unexpected haze in a supposedly clear sake. Deliberate retained solids, protein-related haze and spoilage aren’t the same diagnosis. Condition and product information determine how far the visual evidence can take you.
Practical station 5: koshu
Choose an intentionally matured sake and compare it with a younger example. Include contrasting maturation conditions across later sessions if your course permits. Not every aged sake becomes deeply colored, because storage temperature, time and composition affect the rate and nature of development.
Hypothetical case: amber color, dried fruit, nuts and integrated savory development continue attractively on the palate. Together these observations support maturation more convincingly than color alone. A pale sample with subtle development could still have a genuine maturation history.
Model explanation: storage permits chemical development, including reactions that alter aroma and color. The NRIB guide gives background on maturation and evaluation. A conclusion of koshu should not include an invented number of years, vessel type or temperature unless the task supplies that information.
Review task: compare intended development with an unpleasant stale or damaged impression. Some descriptors overlap, so the whole pattern and condition matter. Don’t reward every old aroma as complexity or condemn every mature note as a fault.
Combine the clues in an overlapping-style exercise
After the five stations, taste one sample with two relevant features, such as nama nigori or matured ginjo. Conceal the label and ask for more than one supported possibility. This removes the artificial assumption that one correct observation must cancel another.
For a hypothetical cloudy, lively sample, nigori may have strong visual support while nama remains a more tentative inference. The final answer can express different confidence levels. That is a better account of the evidence than treating both conclusions as equally certain because they appeared on the same label later.
Keep a correction log with three columns: observation, proposed explanation and revealed production information. Look for patterns in your mistakes. If every full-bodied sample becomes yamahai in your answers, practice counterexamples. If every pale sample excludes koshu, compare maturation under different conditions.
Move from practice to the timed task
For a full rehearsal, use two samples over 30 minutes and follow the specific conclusion requested for each. Complete the descriptions and leave time to check internal consistency. This is a planning exercise; a particular tutor’s sample selection and marking must follow the applicable assessment brief.
Use your strongest relevant observations in a concise production explanation. Don’t turn the answer into an essay on every possible brewery method. The marker needs a justified response to the question, and an unsupported guess at the rice variety won’t rescue an omitted palate description.
Review the starter mechanisms, heat-treatment histories and specialty production choices behind the sensory clues. Use the systematic description before drawing the conclusion, then rehearse with the timed simulation.
One-page revision summary
Practice the five required production groups through deliberate contrasts, then combine overlapping styles. Link observations to mechanisms and qualified conclusions, test alternatives, and separate revealed facts from blind evidence. Nigori has a particularly visible clue; nama and starter methods need more caution. Keep quality, production and personal preference as separate questions.
Knowledge check: 10 original practice questions
Independent TFE questions, not official WSET examination items. Choose one answer per question; explanations follow separately.
1. What can fruit and flowers support blind?
2. Why can kimoto and ginjo coexist?
3. What differentiates yamahai from kimoto production?
4. Fresh fruit and slight bubbles establish which conclusion?
5. Why conceal labels until notes are written?
6. What belongs in a useful correction log?
7. Which is the best koshu argument?
8. What should a production answer prioritize?
9. Which observation most directly supports nigori?
10. Which comparison best isolates pasteurization effects?
Answers and explanations
1. D — A qualified ginjo-technique inference.. The aromatic pattern can fit ginjo production without proving every legal or documentary detail. Mapping: Unit 2 LO1.
2. A — Starter method and ginjo brewing describe different production decisions.. A traditional starter can be used within a refined ginjo approach, so the terms are not mutually exclusive. Mapping: Unit 2 LO1.
3. D — Yamahai omits the traditional mashing work.. Both develop starter acidity through lactic acid bacteria, while the traditional mashing step distinguishes kimoto. Mapping: Unit 2 LO1.
4. C — Nama is possible, but alternatives remain.. Freshness and gas can occur in more than one production history, so they are suggestive rather than documentary proof. Mapping: Unit 2 LO1.
5. C — To reduce expectation bias.. Writing the observation first helps prevent category information from supplying sensations that were not perceived. Mapping: Unit 2 LO1.
6. B — Original observations, proposed explanations and revealed facts.. Preserving the initial reasoning allows specific errors and alternative explanations to be reviewed. Mapping: Unit 2 LO1.
7. B — Coherent developed aromas, color and palate support maturation.. Several compatible observations give stronger support than one clue, while precise age remains unproven. Mapping: Unit 2 LO1.
8. C — Relevant observations linked to the requested inference.. The answer should justify the technique relevant to the question rather than substitute unrelated knowledge. Mapping: Unit 2 LO1.
9. B — Retained rice-derived solids in a deliberately cloudy sample.. Deliberate retained material supplies direct visual evidence, while sweetness and heat treatment remain separate questions. Mapping: Unit 2 LO1.
10. A — Suitable matched examples differing in heat treatment.. Matching other variables improves interpretation, although ordinary practice is not a perfectly controlled experiment. Mapping: Unit 2 LO1.